Generating Final Reports
IMPORTANT
Paid subscribers will soon be able to generate Digitally Signed and Timestamped PDF Reports with a single click. This feature is currently in development and is expected to be released in August.
Steps to Generate a PDF Report
To generate a PDF Report, follow these steps:
Download Your Capture
- Download your capture.
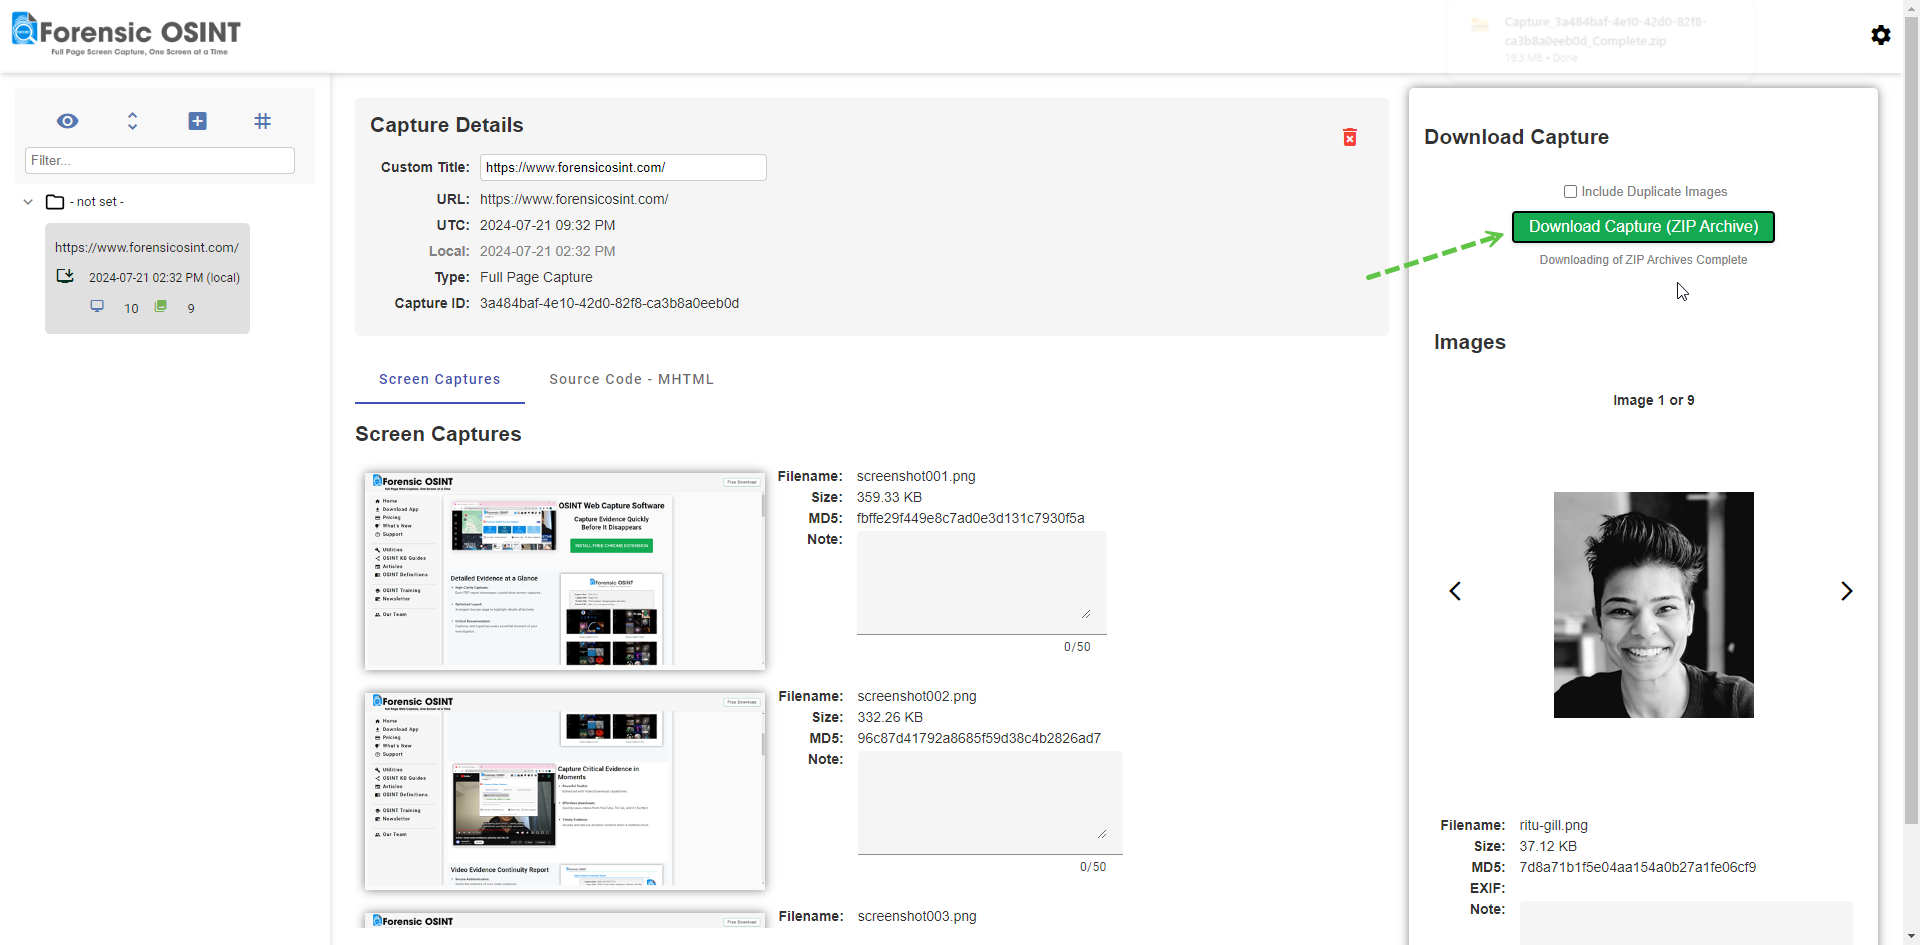
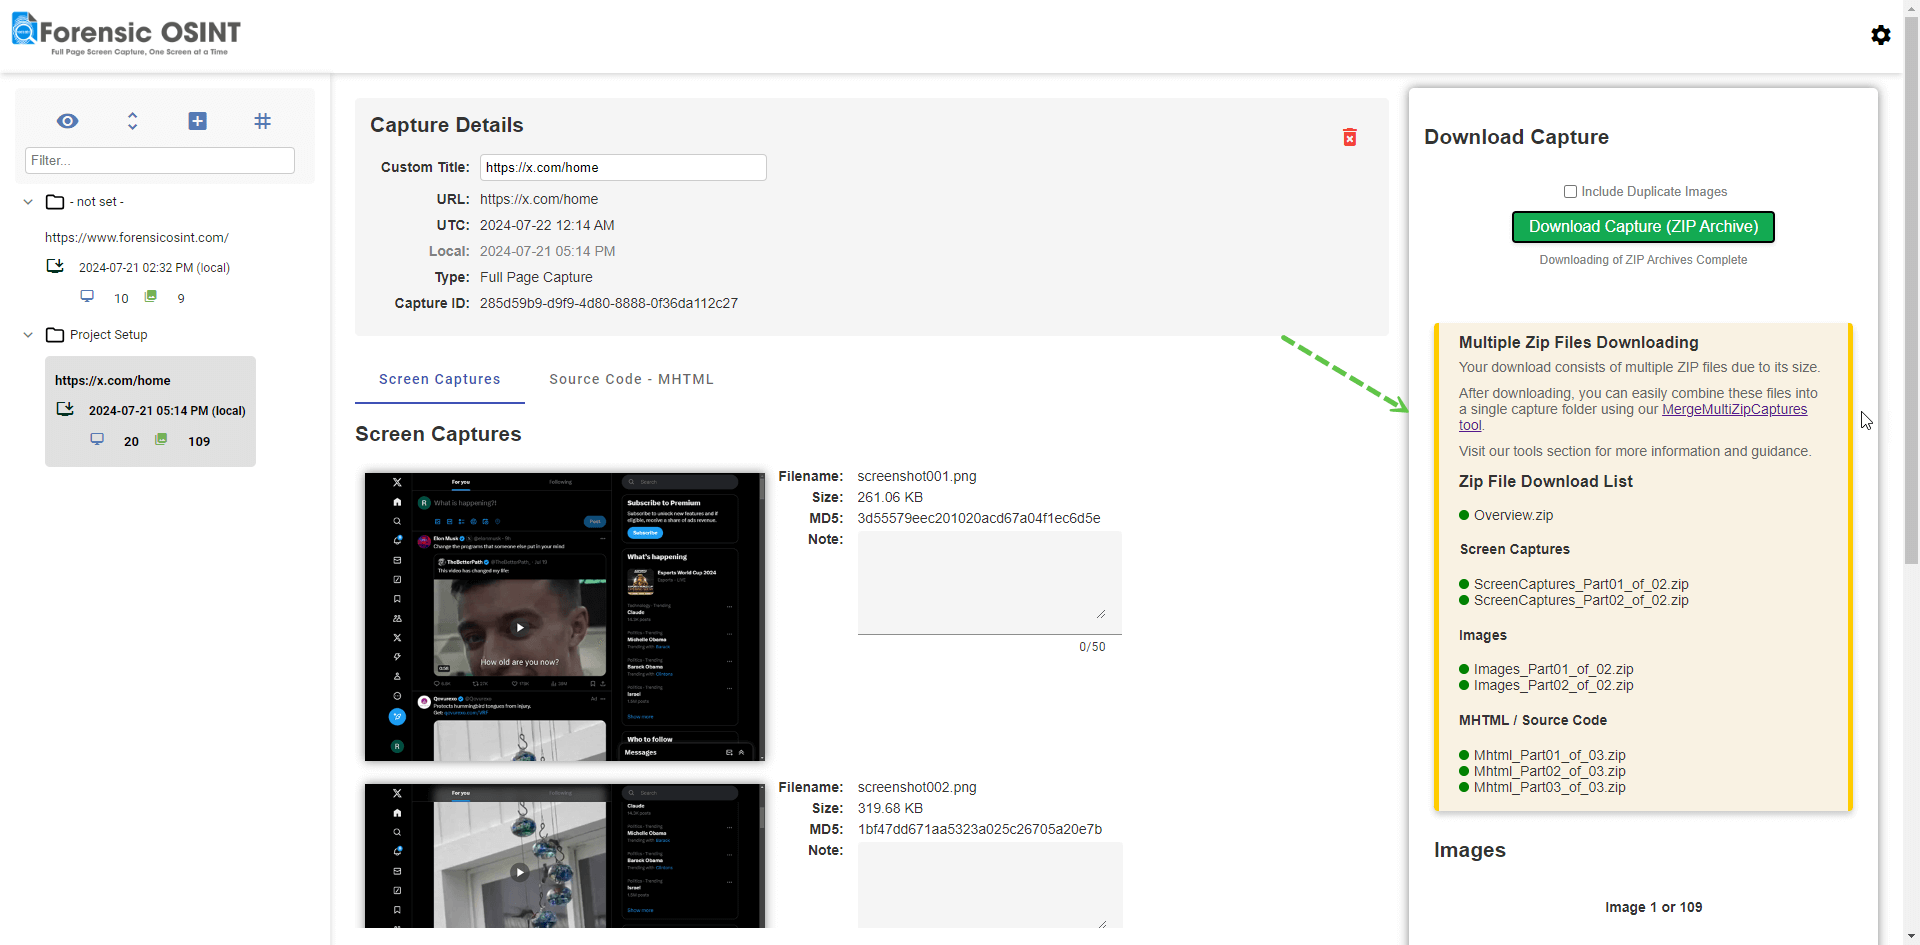
- Depending on the size of your capture, this will result in a single zip download or multiple zip files.
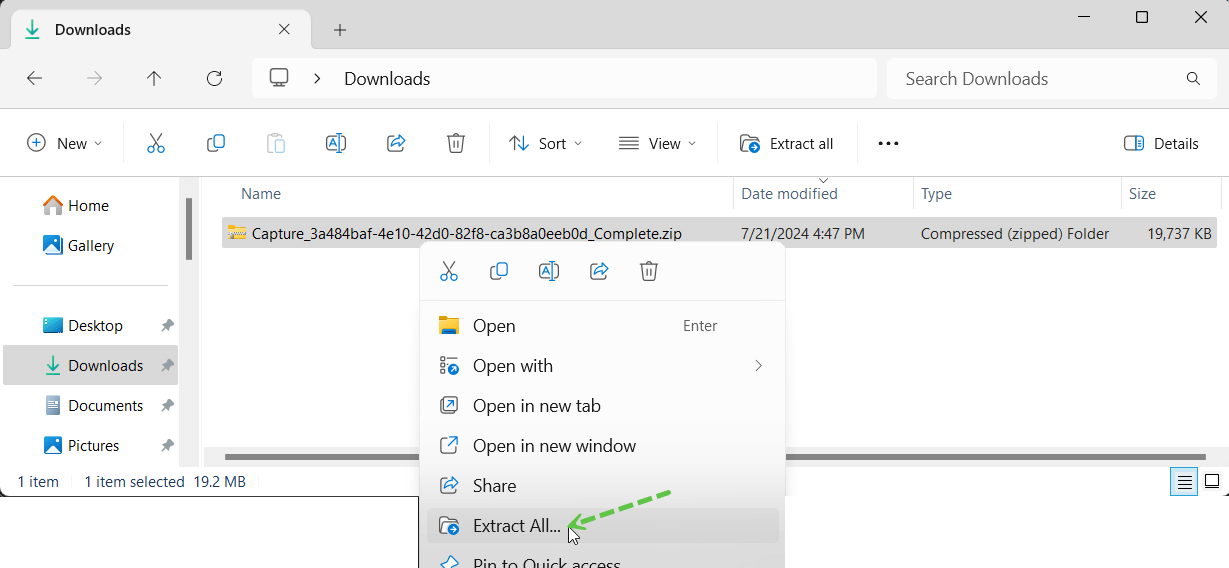
- Go to your Downloads folder.

Extracting Zip Contents
You have two options for extracting files from the zip archives:
- Manual Extraction
- Right-click on the zip archive and select "Extract All".
- Select a new folder for the extracted contents.
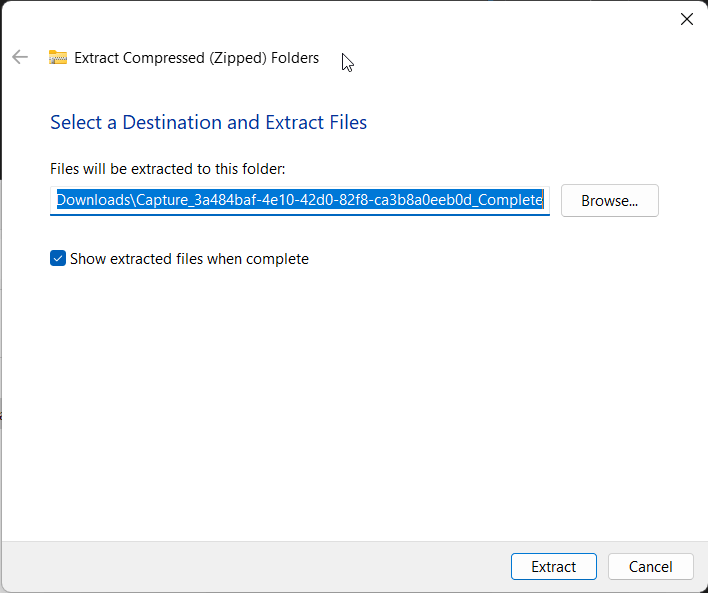
NOTE: If you have multiple zip archives for the same capture, extract all contents into the same folder.
- Right-click on the zip archive and select "Extract All".
- Automated via Zip Extraction Program
- Download the "ExtractZipToFolder.bat" program from Forensic OSINT Utilities and place it in the same folder as your zip archives.
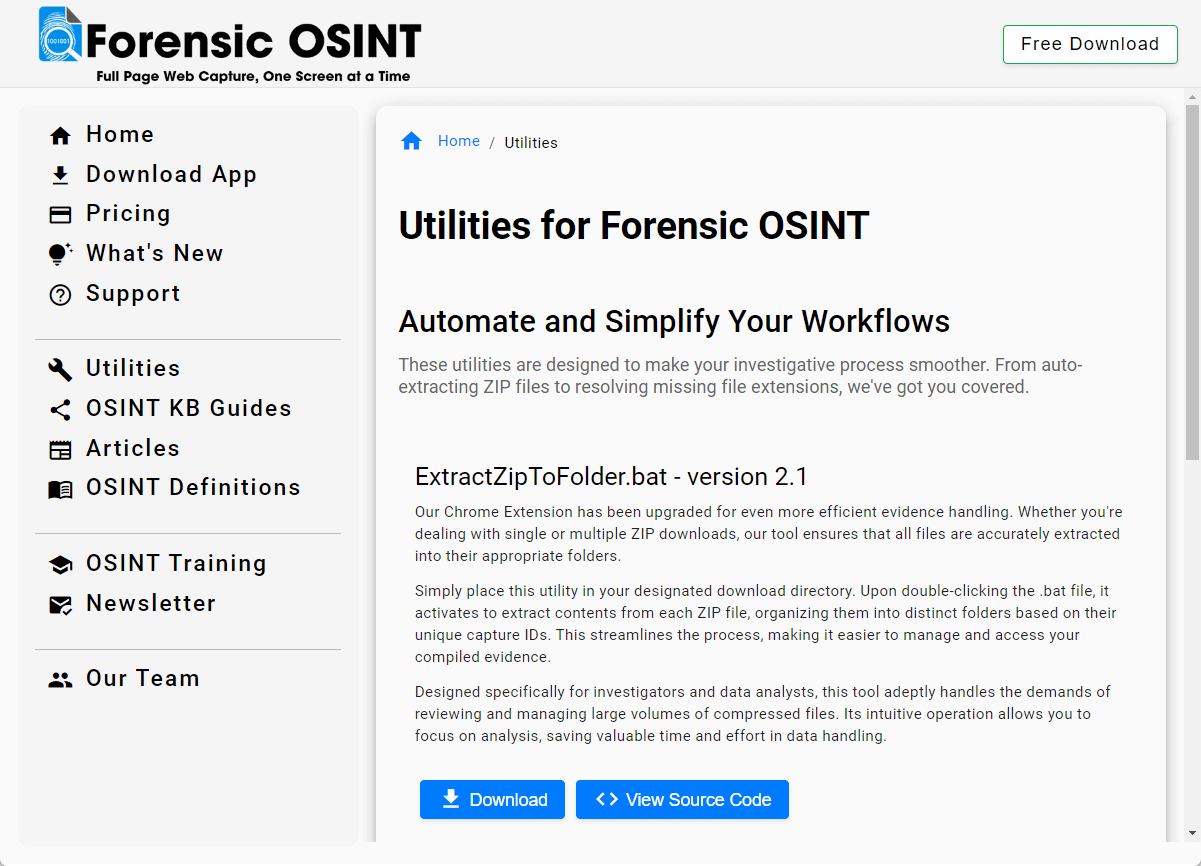
- Double-click the .bat program. A warning message will appear. If unsure, refer to the section below about this message.
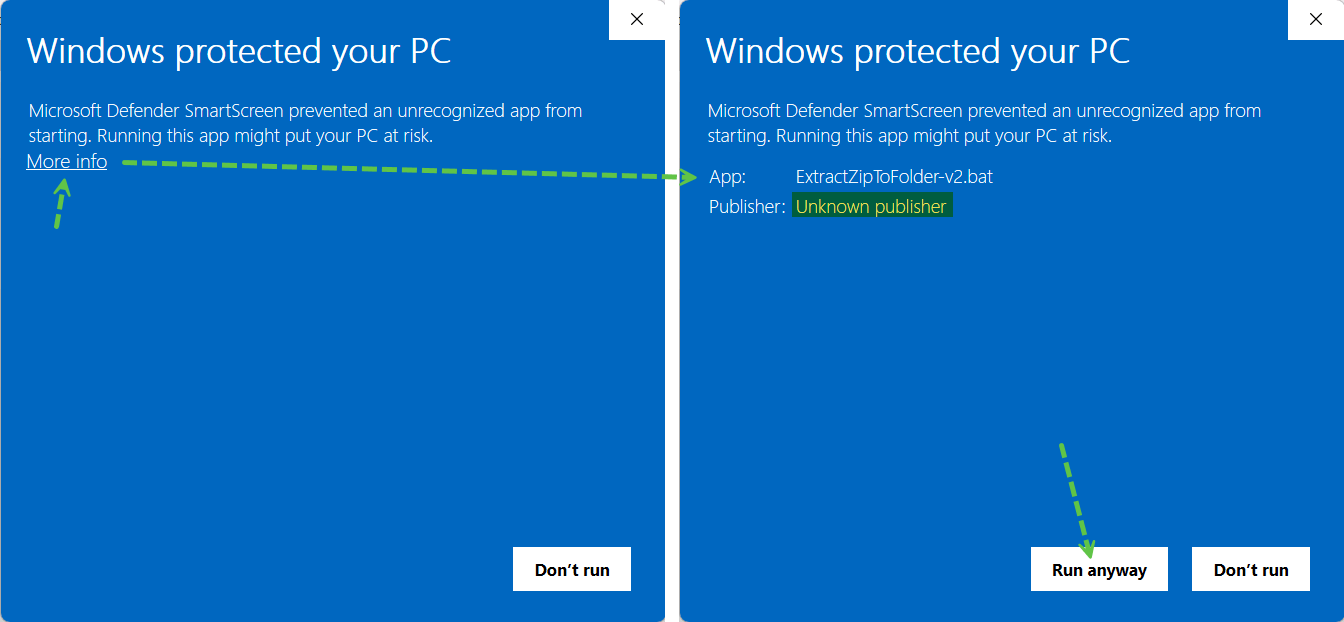
- Click "More info" and then "Run anyway". The program will extract the contents as required.
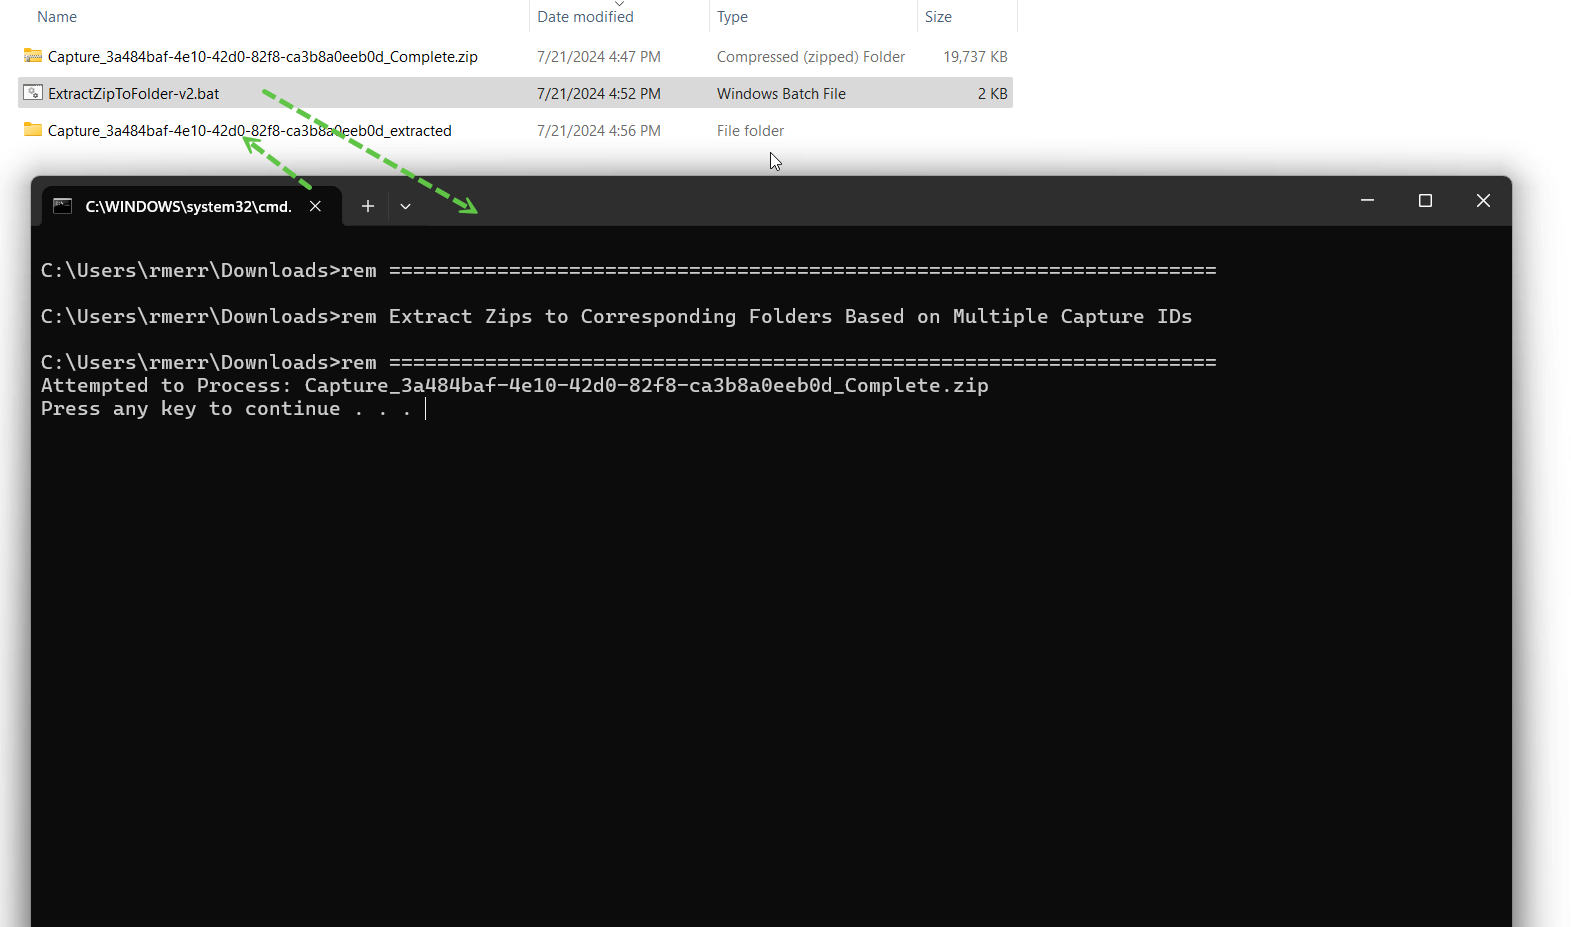
- A new folder will be generated with "_extracted" at the end. All contents of your zip archive will be extracted into this folder.

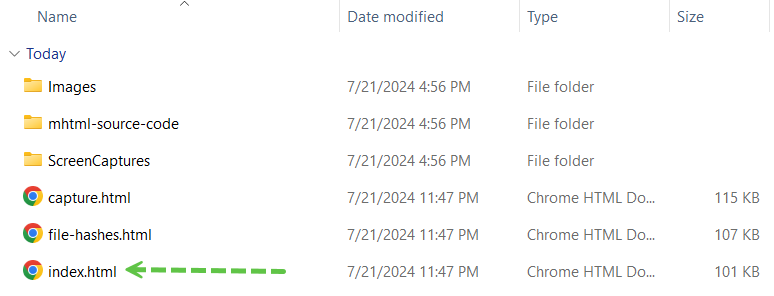
- Open this new folder.
- Download the "ExtractZipToFolder.bat" program from Forensic OSINT Utilities and place it in the same folder as your zip archives.
Warning Message
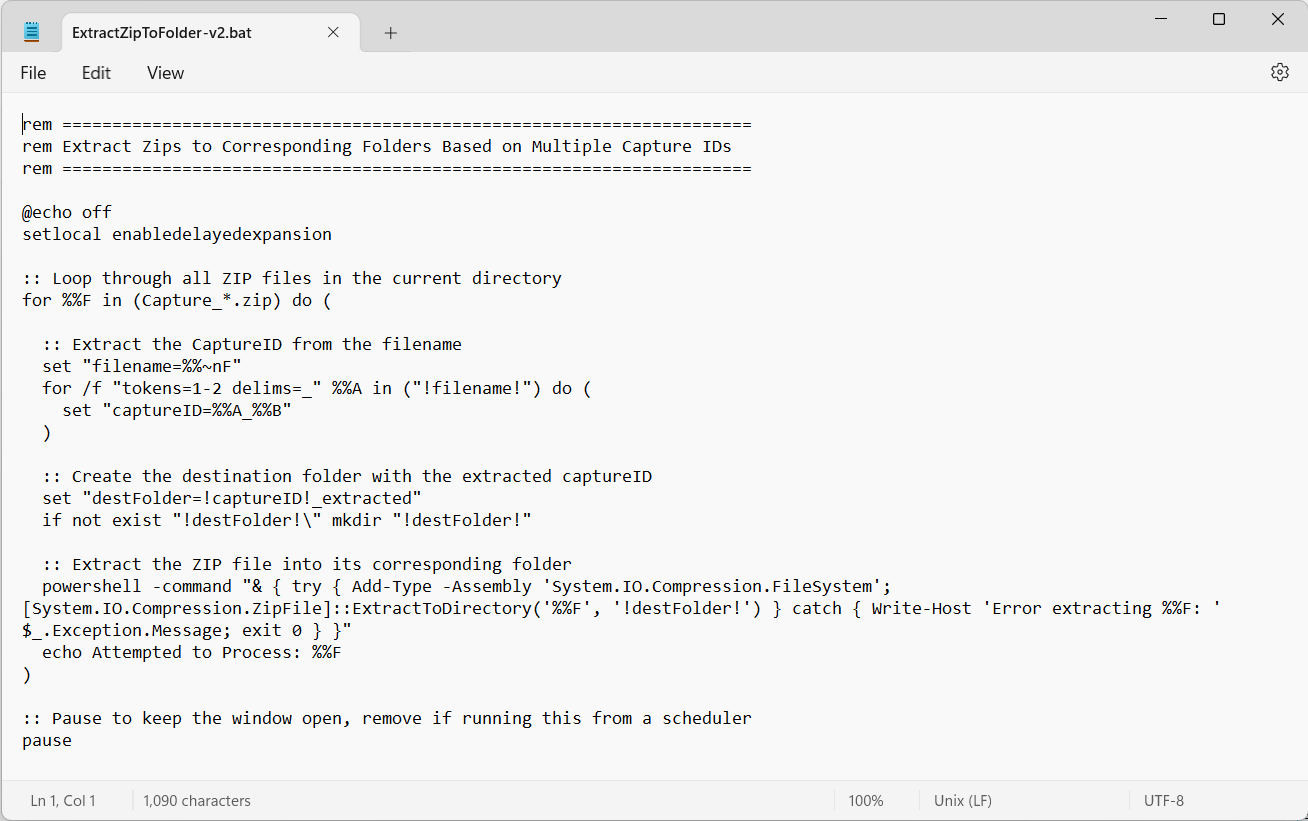
If you use the Zip Extraction Program, a blue warning window will appear. This is normal. .bat files can be dangerous if you do not know who developed them. Verify the code is safe before use. Here's how to inspect the file:
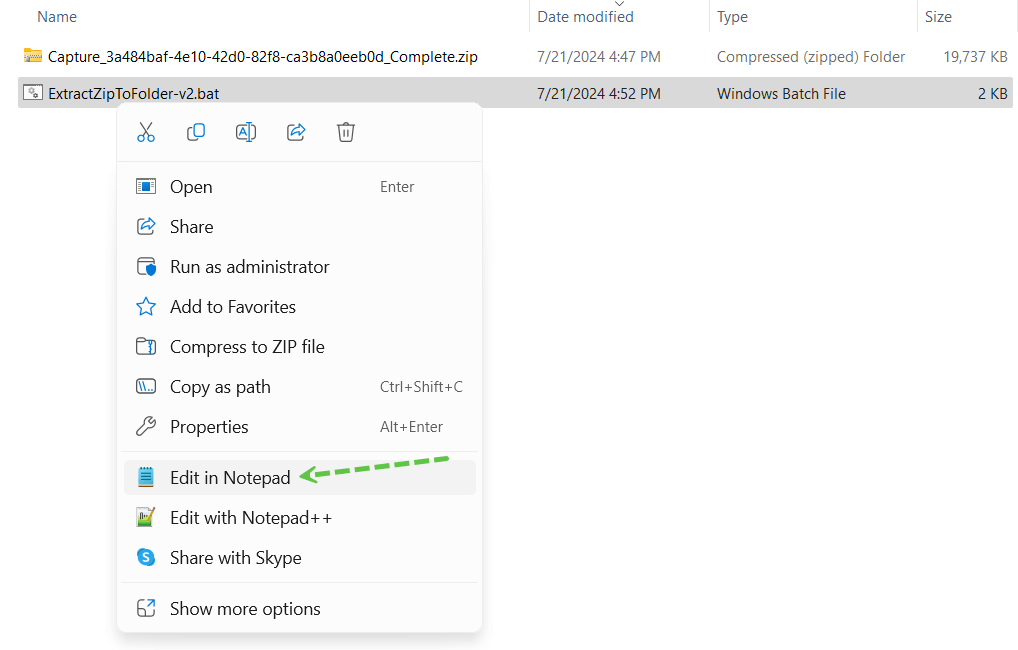
- Right-click on the .bat file and select "Edit in Notepad".
- Review the code to ensure it does not delete or modify data outside the zip files. If unsure, consult someone knowledgeable in programming.
Generate Final PDF Reports
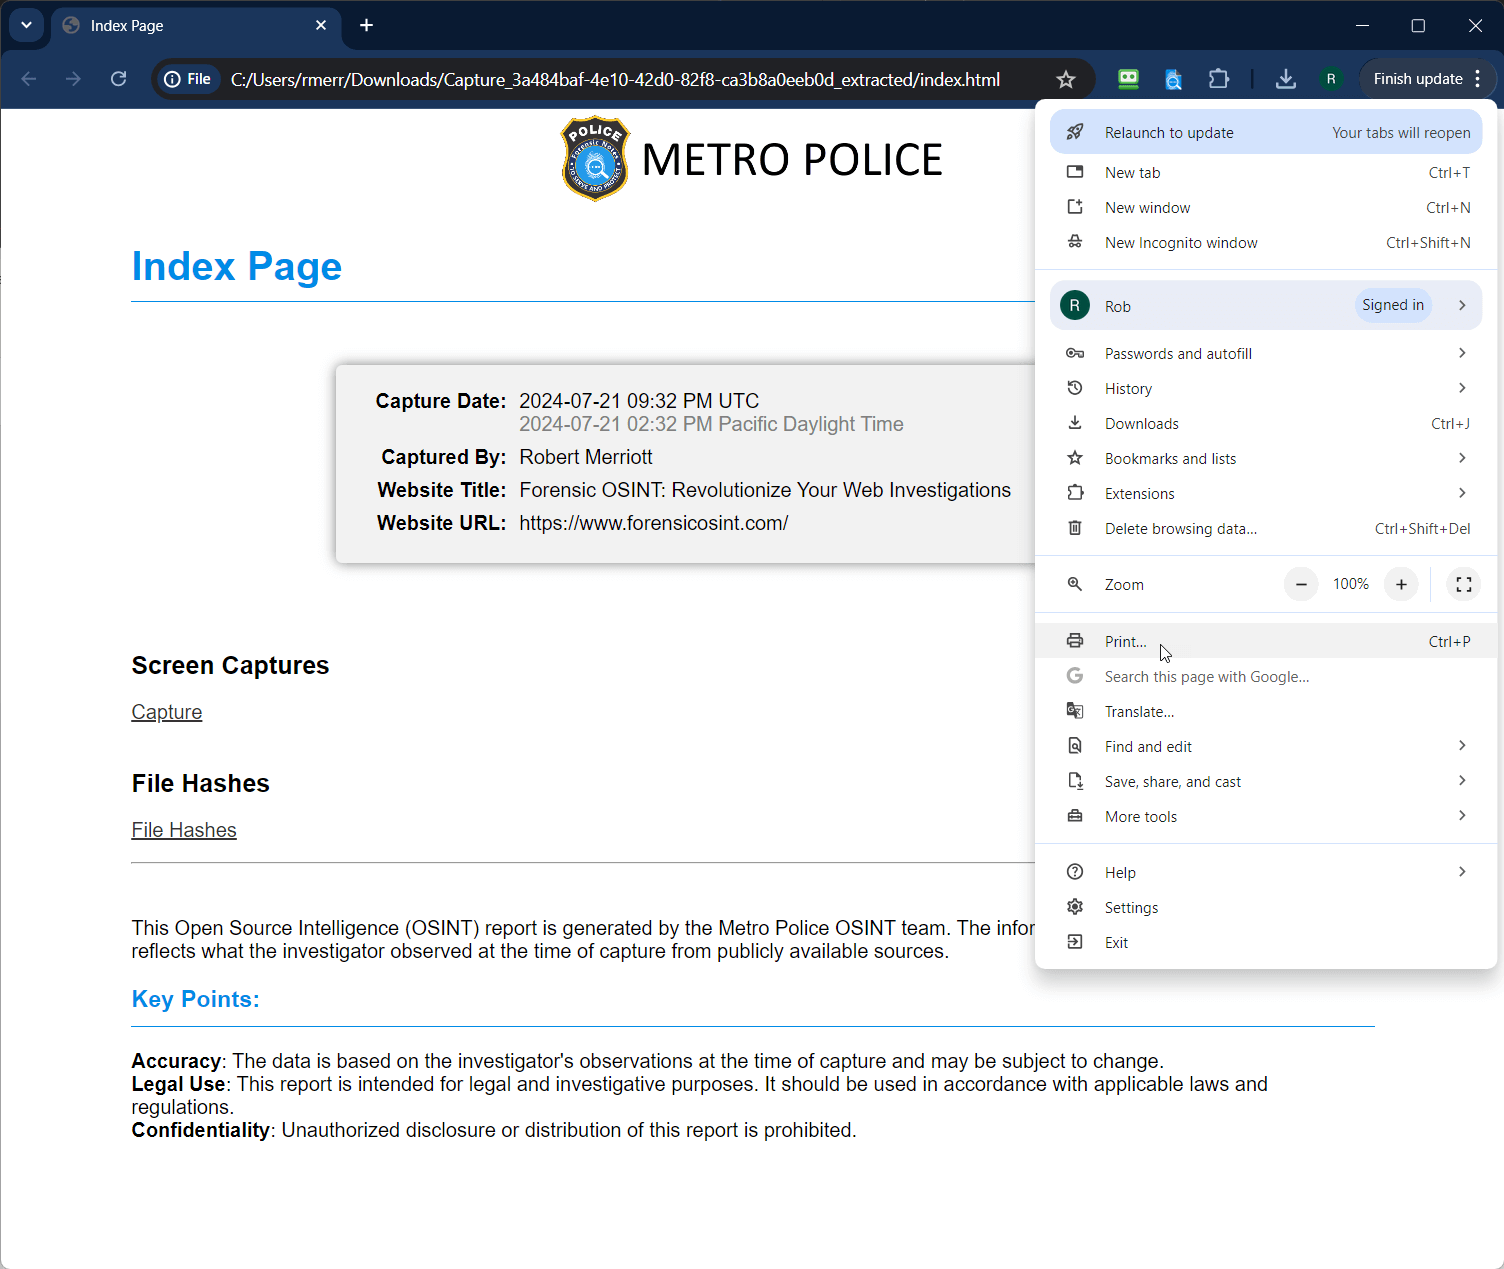
In the 'extracted' folder, you will see three different HTML files. The index.html file is the main file that links to the other files. Depending on your requirements, you can either provide this entire folder to your client or the courts, allowing them to click through the evidence, or generate PDF reports.
- Double-click on index.html.

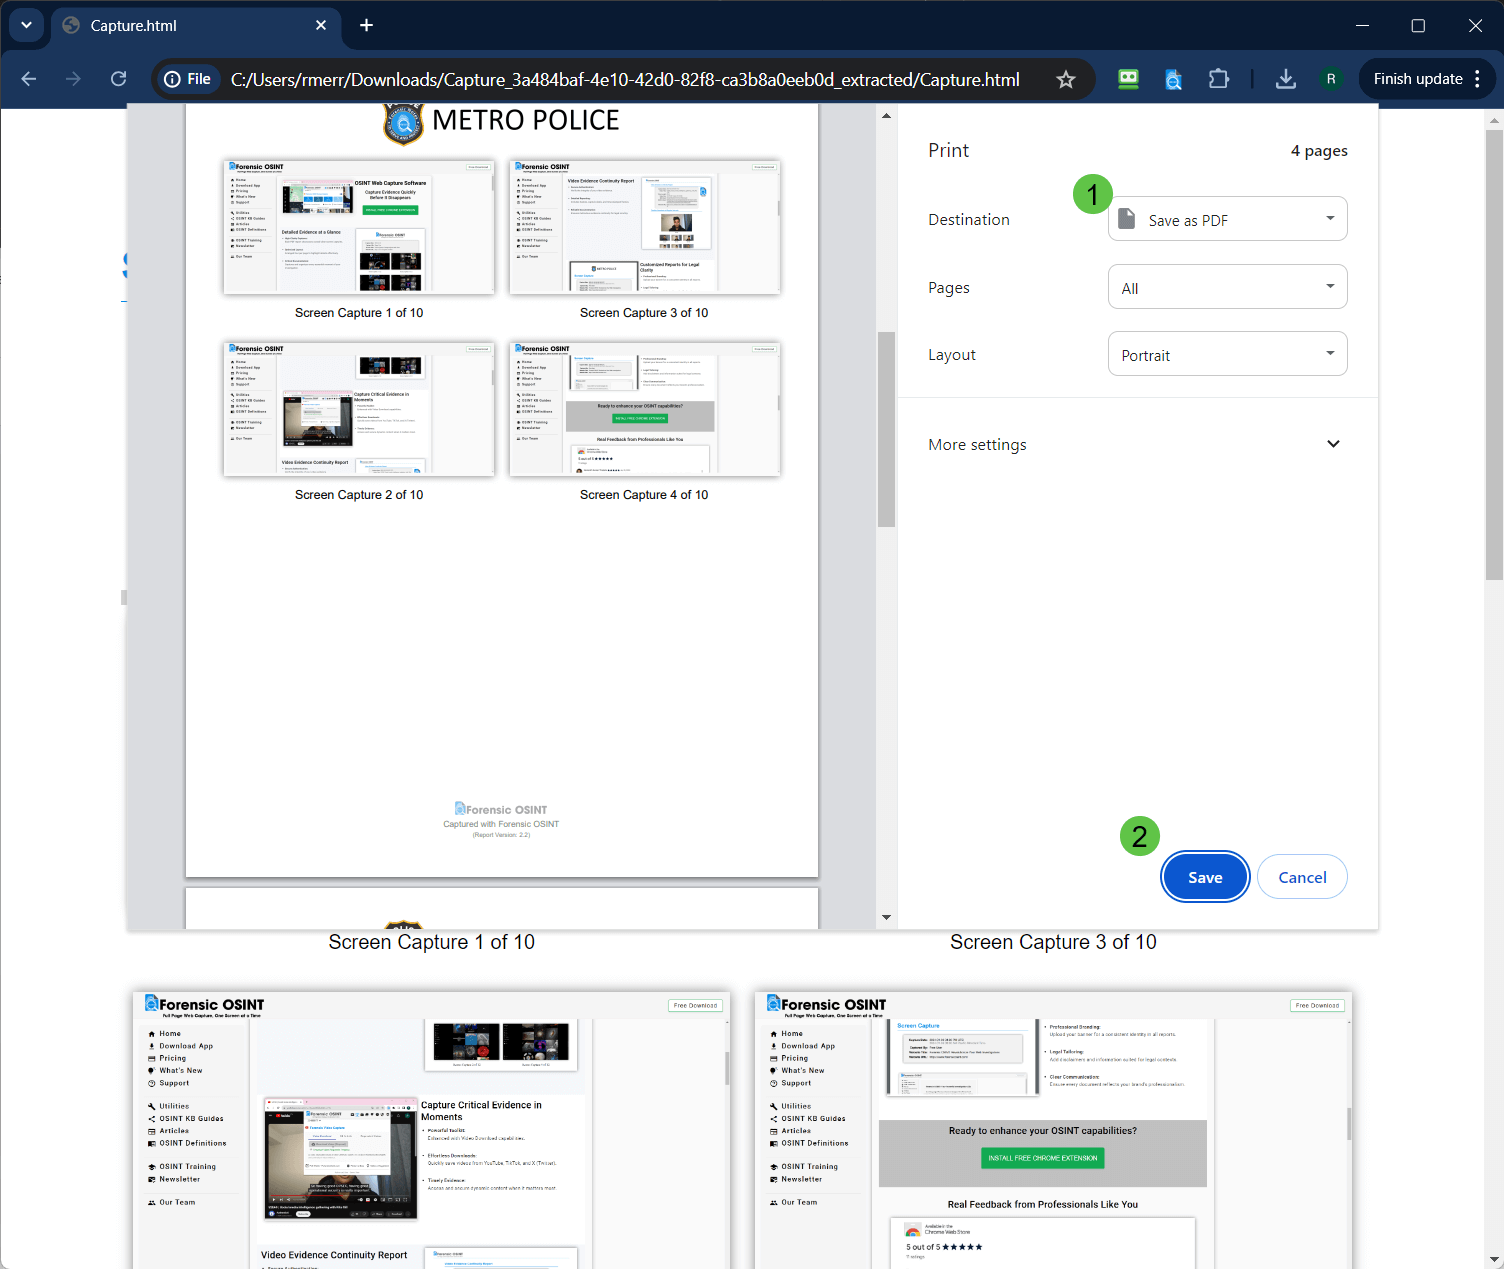
- Right-click on the page or select "print" from the menu.
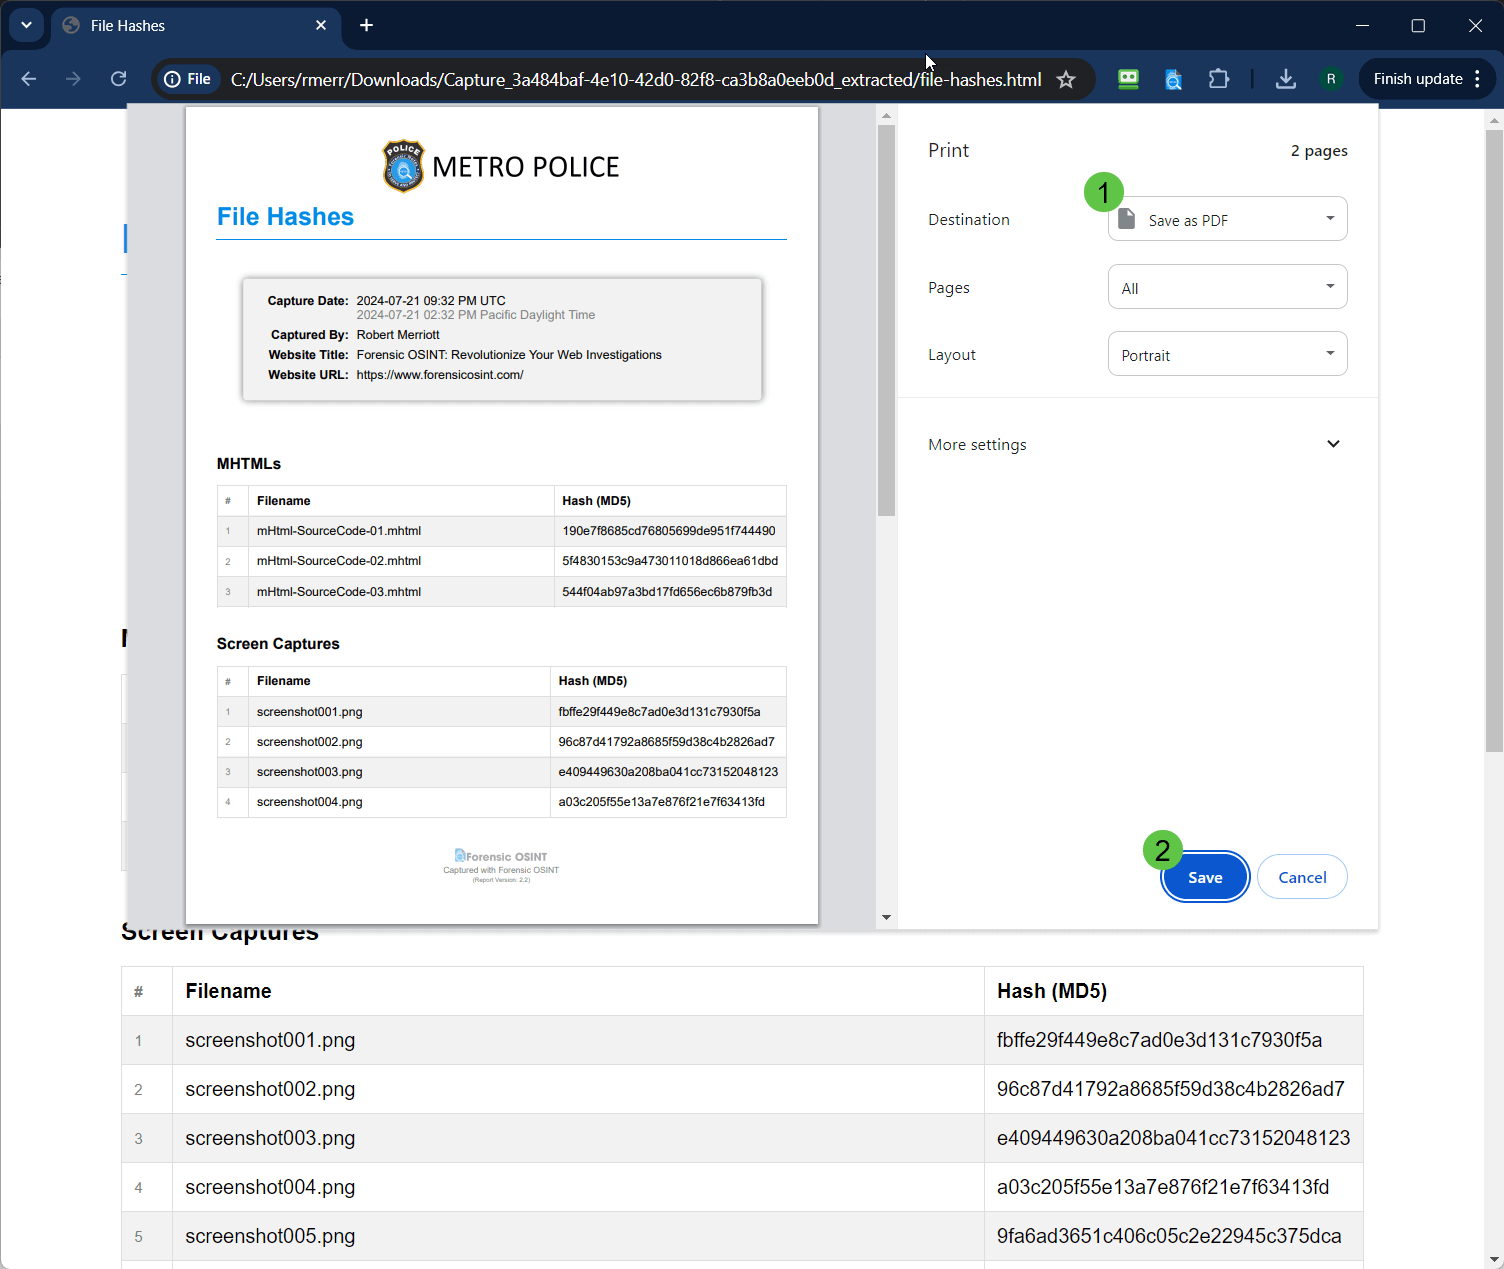
- Set the destination to "Save as PDF" and click "Save".
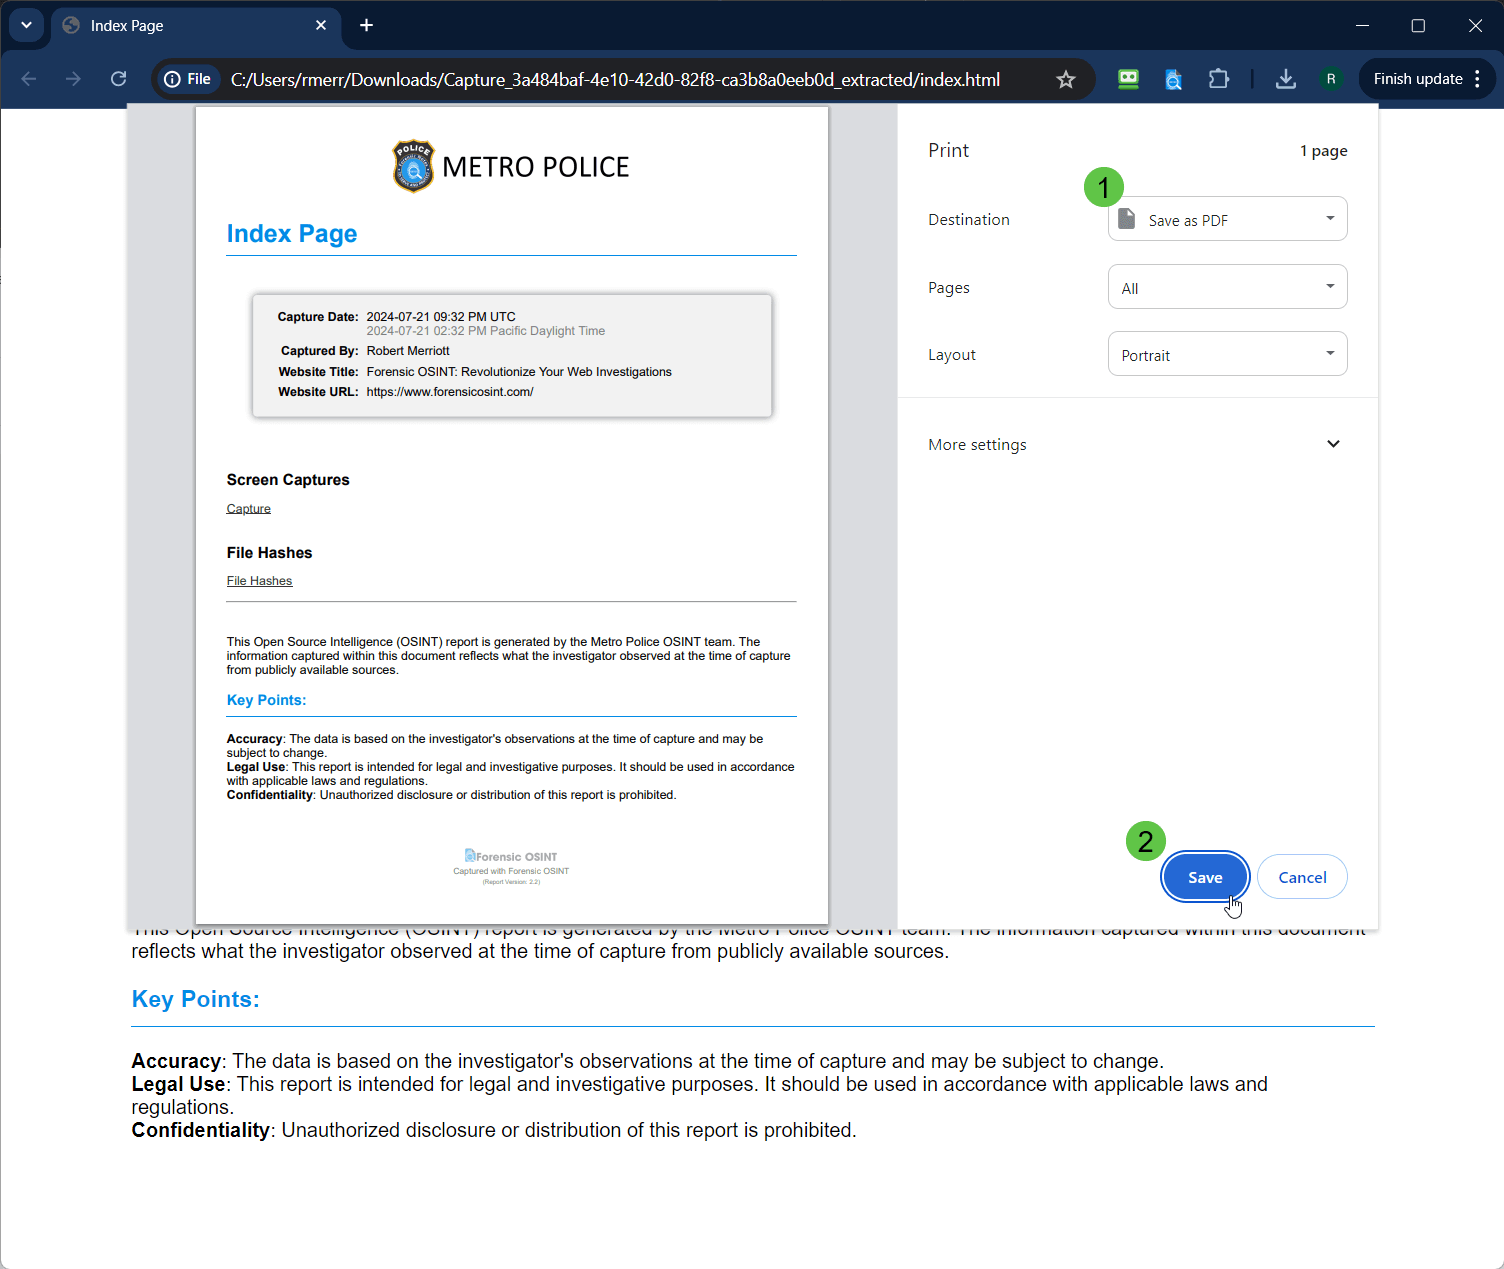
- Save this PDF file in your 'extracted' folder.
- Go back to the index.html file and click on "Captures" to open the Captures page.
- Repeat steps 2 and 3 for the Capture page.
- Go back to the Index page and select the Hashes page.
- Repeat steps 2 and 3 for the Hashes page.
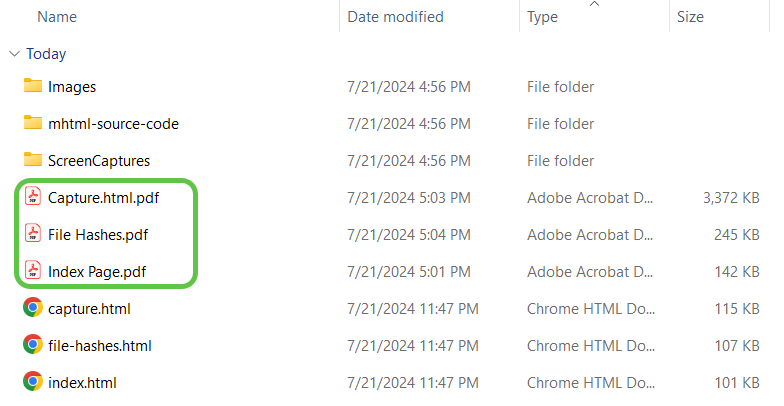
- You should now have three new PDFs in your 'captures' folder. These are your final professional reports ready for court purposes.
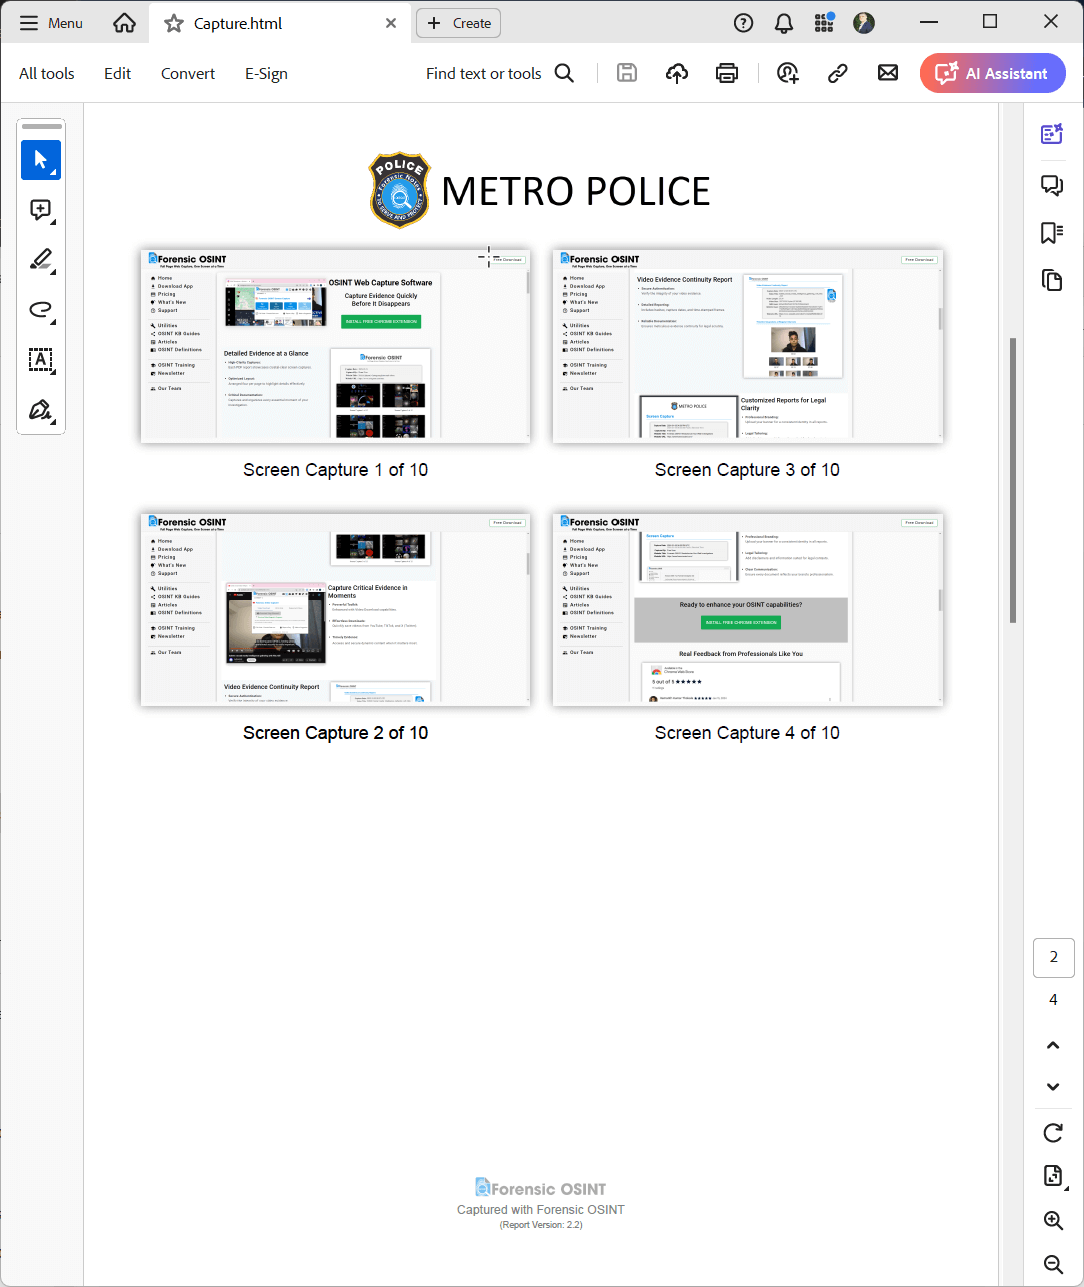
Example Final Report
TIP
The above steps may seem complicated, but once you do it a couple of times, the process will be quick, allowing you to create professional OSINT reports with ease. We will soon provide a push-button solution for paying subscribers.

Minimum Requirements:
- 8 Characters
- 1 Upper
- 1 Lower
- 1 Digit

